Kanban: Continuously improving our process!
In my previous post I explained how our development process works at a high level. Now I will try to go into detail and explain how we develop day-to-day.
Out of our team of 4 developers, one developer (me) has the role of product owner. And to be honest being a product owner is almost a full time job these days.
Daily stand-ups
We start every day with a daily stand-up meeting in front of our Kanban board. Every team member answers the well known questions. When everyone has answered the questions we look at our "small controlled experiments"-timeline to see if there are experiments that will expire today which we have to evaluate. We discuss if the experiment has been successful or not. This discussion could lead to three different outcomes:
- We’re happy with the results of the experiment and embed this in our process;
- The experiment didn’t deliver what we’re hoping for, so we cancel the experiment;
- Undecided, so we continue with the experiment for another fixed period.
After that we can bring up new experiments to improve our process. The person who brings up the experiment explains his objective and improvement. We do not criticize the idea, we just give the experiment a due date. On that day we will evaluate and discuss the experiment. This way we continuously improve our process. There are no rules for the experiments, we only try to keep the impact of an experiment within reasonable limits.
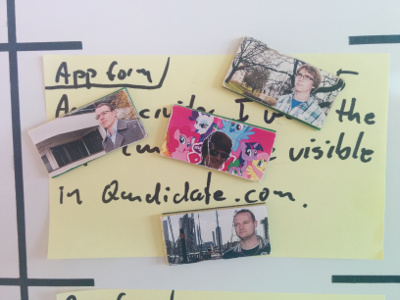
At the end of the stand-up we pull new stories from our backlog. The product owner gives a small explanation about what the story is all about.
Our Kanban board
We use our Kanban board to visualize the current state of our activities and to manage the development process. We don’t use any digital tools for managing our process at the moment. Our Kanban board is the only and absolute truth.
We have divided our process into six stages. Every stage can contain a minimal and maximal amount of tickets at the same time.
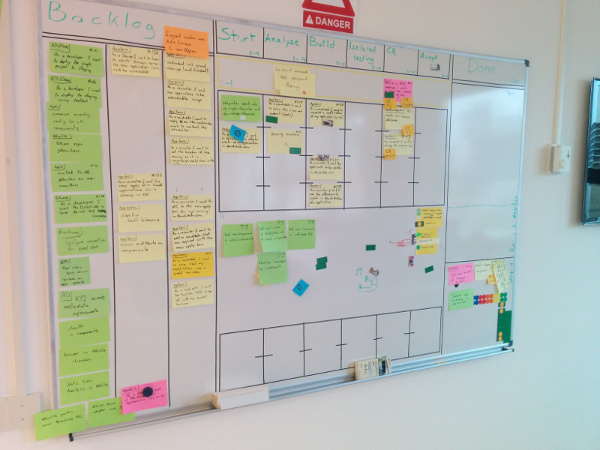
We defined the following 6 phases:
- Start
- Analyze
- Build
- Isolated testing
- Code review
- Acceptance testing
All these phases are represented by a column on our Kanban board. We write our stories on stickies. One story per sticky. We often refer to it as a ticket or issue. Every ticket gets a number corresponding with an issue in our GitHub Kanban repository. This repository only exists for managing the issues, allowing us to link our pull requests to our Kanban stories.
A developer places his personal magnet on a ticket when he starts working on a particular ticket. If a ticket is ready to be pulled into the next phase we place a green magnet at the bottom right corner to indicate that the ticket can be pulled.
Phase 1: Start
When we pull a ticket from our backlog it will be placed in the Start phase. This phase only implies that the ticket will be picked up very soon. Tickets get pulled to the next phase by the order they appear in the start phase. Tickets are placed in start during the daily stand up. The product owner decides which tickets will be placed in start.
Phase 2: Analyze
The second phase is analyze. In this phase the product owner adds acceptance criteria to the ticket. These criteria are supposed to be very high level and should provide the developer with a lot of freedom in the way he implements the ticket. The criteria are commented on the issue in GitHub. When the product owner is done analyzing, a developer reviews the criteria.
Phase 3: Build
In this phase the actual coding is done. When we implement a story we always try to do this with the minimal scope in mind. Just implement the story's intend. For example if a story says: "As a recruiter I want to delete a candidate", don’t implement a popup asking the user if he is sure. If the product owner (or the stakeholders) would like to see a popup, they should create a story for this. When a front-end design is needed the developer makes one himself. We always start building in pair. Coding needs to be done using our coding standards. And it must be unit tested. Before a story can be pulled into the next phase the developer makes a screencast that demonstrates the story.
Phase 4: Isolated testing
The product owner watches the screencast and tests the ticket on our staging environment, to see if it works and if all acceptance criteria are met.
I have to admit, because the criteria are very high level it can occur that it was not implemented the way I expected. We consider this a win! Because the feedback-loop was very small, not a lot of time and other resources were lost, and we learned a lot! The product owner learned that his criteria were wrong, and the developer learned that his interpretation was wrong. So the next ticket will have better criteria and will be better understood.
On the other hand, my experience as a product owner is: I am often positively surprised by the implementation. By giving this kind of freedom to a developer you get better ways of approaching a problem than you can think of yourself.
Phase 5: Code review
I think this is the most important phase in our process. Every company should have this phase if they write code and have more than one developer. Now a second developer reviews the code. Are our coding standards used? Are the tests complete and do they make sense? Finally when the second developer has approved the code our lead developer conducts a final review and merges the code in our trunk.
Phase 6: Acceptance testing
This phase was created in our process to do the integration tests. But as we don’t have a dedicated tester at the moment we skip this phase for now.
Signaling team feedback on tickets
The phases "analyse", "isolated testing" and "code review" must be reviewed by a second person. We visualize everything using our Kanban board. When a ticket in a particular phase is ready to be reviewed, a green magnet will be placed on the bottom left corner of a ticket. We add comments at the GitHub issue or at the pull request if there are code reviews comments. We place a small sticky at the bottom left corner of a ticket to indicate that there are comments. The name of the reviewer and the phase where the ticket was and when the comments are added are written on the sticky. Once the comments are solved, the sticky is moved to the right and the reviewer checks if the comments are correctly solved. If so he places the green magnet on the bottom right corner. If there are new comments he places a seconds sticky on the left and the process repeats itself until there are no comments. The small stickies always stay on the right corner of a ticket, this way we can see which tickets had a lot of problems and we should probably investigate why there are a lot of comments. Maybe the acceptance criteria where incompleted or the developer missed some insights. Now we have noticed the problem, we can try to learn from it, and avoid them in the future.
Conclusion: Visualize!
The Kanban board visualizes our process. This way we can detect problems in our process, learn from our mistakes and try to avoid them in the future. If you don’t visualize problems in your process you don’t know that they exists let alone that you can solve them!